
7 Cantilever Rack Buying Tips for Global Buyers
Cantilever Rack decisions begin with the material, not the catalogue. Long timber, steel tube, and irregular loads each need suitable arm lengths, clearances, and support. A system that looks sturdy in a product photo may not fit a real aisle. Measure the longest load, check its weight, and note how forklifts will approach each bay.
A useful working reminder comes from Evan Cole, a fictional composite warehouse-storage consultant created for this introduction: “Choose the rack around the load, the handling method, and the building—not the other way around.” This is an illustrative quotation, not a verified statement from a real expert. The principle still matters. Buyers should ask suppliers for documented capacity ratings, configuration details, and installation guidance. Confirm whether stated capacities apply to each arm, each upright, or a complete bay. Those figures are not interchangeable.
The seven buying tips ahead will help global buyers compare specifications, finishes, accessories, supplier support, and total cost. They also highlight details that are easy to overlook: uneven floor conditions, future product changes, and access for inspection. A spreadsheet can help. It cannot replace a site check. One point deserves a second look: even accurate load data may change as inventory shifts. Treat the purchase as an engineering decision, then revisit the assumptions before ordering. A careful comparison can reduce costly mismatches and make day-to-day storage safer and more practical.
Understanding Cantilever Racks and Their Applications
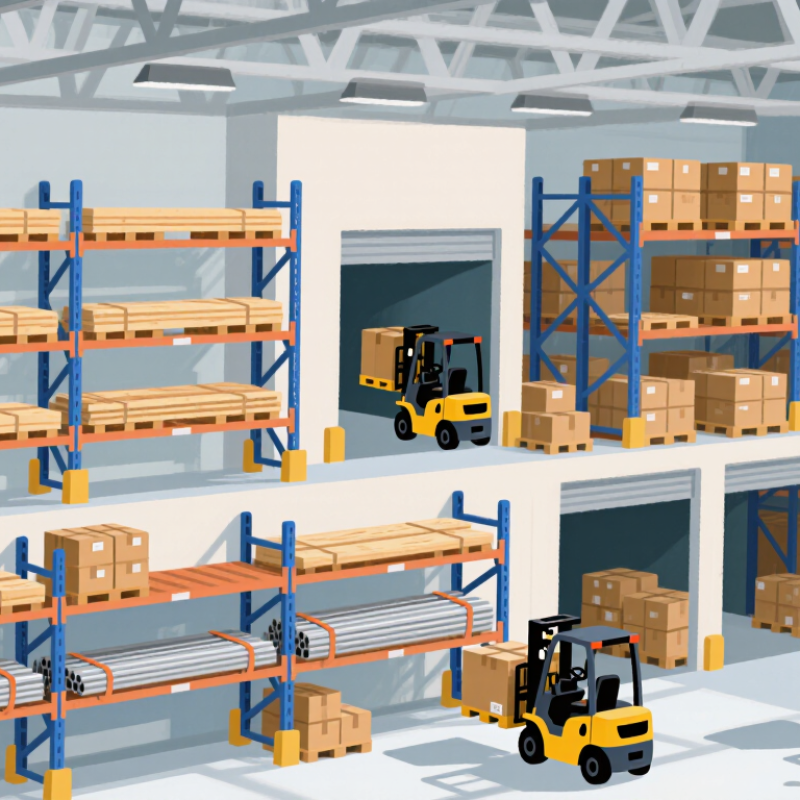
Cantilever racks store long or awkward loads on horizontal arms projecting from upright columns. With no front posts, forklifts can approach bundles from the aisle more directly. Common applications include storing timber, steel tubing, plastic pipe, trim, and some sheet materials. The open face makes labels and stock easier to see, but it does not make every load simple to handle. Long stock can flex. Thin boards or tubes may sag if their supports are too far apart, while uneven bundles can shift during retrieval. Sheet goods need careful support across their width to reduce bending and edge damage.
A suitable layout starts with the actual load: its length, weight, shape, and how often workers retrieve it. Measure the longest items and check that arm spacing supports them at several points. Confirm the rack’s rated capacity with a qualified supplier or engineer; capacity depends on the frame, arm arrangement, and loading pattern. Leave enough aisle clearance for the equipment and load being handled. Indoor storage usually needs less weather protection, while outdoor installations require materials and finishes suited to exposure. It is easy to focus on rack capacity and overlook the floor, turning space, or awkward bundles that make daily handling difficult. That deserves a second look.
Assessing Load Capacity, Dimensions, and Storage Needs
Before comparing cantilever racks, list the heaviest and longest items you expect to store. Include future stock, not only today’s inventory. A bundle of steel pipe may look light per piece, yet several bundles can create a substantial arm load. Check whether the stated capacity applies to each arm, each upright, or a complete rack section. These figures are not interchangeable. Ask for written load ratings that match your planned configuration.
Measure the goods, rack area, and handling equipment. Record the longest item, its weight, and how much space workers need to place it safely. Then check arm length, upright height, base depth, and aisle width against those measurements. A few centimeters matter. A forklift turning with a long load needs more room than an empty truck. I have seen plans that fit neatly on paper but feel cramped once stock arrives. It is worth checking twice.
Storage needs also shape the rack layout. Decide whether items will be stored in bundles, accessed from one side, or sorted by length. Leave practical clearance between loads, and avoid assuming every arm will carry the same weight. If the load is uneven, capacity may change. Share clear drawings and item data with the supplier, including local handling equipment and site constraints. Some details may still be missed, so confirm the final layout on site before installation.
Choosing Materials, Components, and Rack Configurations
Cantilever racks should be selected around the loads they will actually carry, not just the dimensions on a drawing. For steel members, compare the rated capacity of the complete rack system, including columns, bases, and arms. A thicker-looking column alone proves little. Ask for load tables that match the proposed arm spacing and configuration. For damp or outdoor areas, consider corrosion-resistant finishes, and check whether damaged coating can be repaired.
Pay close attention to arm connectors, locking pins, braces, baseplates, and anchors. These parts affect stability and should suit the floor and expected handling conditions. A small connector detail is easy to overlook. It can matter when forklifts place long, uneven bundles. Confirm that arms can be adjusted without leaving unsupported loads, and keep capacity labels visible to operators.
Choose single-sided racks against a wall and double-sided racks where access from both sides improves picking. Measure the longest stock, including any overhang, then check aisle width and forklift turning space. This step is often rushed. I would revisit it before ordering, because a workable rack layout can still create awkward daily traffic. Share sample load weights and handling methods with the rack supplier, and request drawings for review before fabrication.
7 Cantilever Rack Buying Tips for Global Buyers - Choosing Materials, Components, and Rack Configurations
| Buying Tip | What to Specify | Practical Checks | Why It Matters |
|---|---|---|---|
| 1. Match the rack to the load | Record the maximum weight, length, width, and shape of each stored item, plus the expected load on each arm and column. | Ask for rated capacities per arm and per upright, and confirm whether the figures assume a uniformly distributed load. Include the number of arms supporting each item. | Long or unevenly loaded goods can create different forces from compact, evenly distributed loads. Capacity depends on the rack design, configuration, and loading method. |
| 2. Choose materials for the environment | Compare structural steel options and protective finishes, such as painted or powder-coated finishes for many indoor settings and hot-dip galvanizing for suitable exposed or corrosive environments. | Specify the installation environment, including moisture, chemicals, temperature, and whether the rack will be indoors or outdoors. Confirm the coating system and surface preparation in writing. | Steel grade and corrosion protection influence strength, durability, and maintenance needs. The appropriate choice depends on the service environment and engineered design. |
| 3. Check arms, bases, and connections | Review arm length, arm profile, connection method, base dimensions, column profile, and any bracing or locking components. | Confirm that arms are compatible with the uprights and that removable arms are positively retained. Check that the base and anchoring details suit the floor and expected loading. | These components transfer loads through the rack to the floor. A suitable configuration should be assessed as a complete system rather than as separate parts. |
| 4. Select a single-sided or double-sided layout | Use single-sided racks where access is needed from one side, often along a wall. Consider double-sided racks for accessible storage on both sides of a central row. | Measure aisle widths, turning space, wall clearances, and the operating envelope of forklifts or other handling equipment. | Rack orientation affects storage access and warehouse traffic flow. The available floor plan and handling equipment determine whether a layout is practical. |
| 5. Set the number and spacing of arms | Plan arm levels and vertical spacing around the longest and heaviest items, the available picking method, and the required storage height. | Check that each item is supported at enough points to limit overhang and avoid excessive bending. Confirm usable clearance for loading and removal. | Appropriate support spacing helps distribute the load and makes stored goods easier to handle. Requirements vary with item length, stiffness, and weight. |
| 6. Verify the floor, anchors, and installation | Provide information about the slab, floor condition, rack height, layout, and anticipated loads so the anchoring and installation can be evaluated. | Have a qualified professional confirm floor suitability, anchor type, embedment, edge distances, and installation requirements for the site. | Rack stability depends on the complete installation, including the floor and anchors. Site conditions should be checked rather than assumed. |
| 7. Confirm documentation and local requirements | Request dimensioned drawings, load tables for the proposed configuration, material and finish details, assembly instructions, and inspection guidance. | Check which local building, seismic, fire-safety, and workplace requirements apply. Confirm shipping dimensions, packaging, installation support, and spare-component availability. | Requirements differ by country and facility. Clear documentation helps buyers review suitability, plan installation, and manage the rack over its service life. |
Checking Safety Standards, Certifications, and Supplier Quality
For a cantilever rack, a load rating is meaningful only when it matches the actual configuration. Check the stated arm capacity, upright capacity, bay spacing, and load distribution. Ask which safety standards apply in the destination market and request the relevant test reports or certificates. Confirm that each document covers the exact rack model, not merely a similar product. Paperwork matters.
Look closely at the supplier’s engineering details. A reliable supplier should explain assumptions about floor strength, anchoring, rack height, and the weight and length of stored goods. Request installation instructions and inspection guidance, too. If a certificate has no clear issuer, date, or scope, ask for clarification before placing an order. A polished PDF is not proof by itself.
Supplier quality also shows in the small details: traceable steel grades, consistent welds, durable finishes, and available replacement parts. Ask how production defects are checked and how damaged components are handled. If possible, review sample inspection records or arrange an independent factory assessment. I have seen buyers focus heavily on price and overlook installation support; that can be a costly gap. I would still compare suppliers carefully, because no single certificate tells the whole story.
Planning Shipping, Installation, and Long-Term Maintenance
For global buyers, cantilever rack planning starts before the racks leave the factory. Confirm the longest load, bundle dimensions, and total shipment weight with your supplier. Compare these figures with container or truck limits, and ask how arms and columns will be protected from moisture and impact. A bent arm can be difficult to spot beneath wrapping. Photograph packages before unloading. Measure twice.
Tips: Request a packing list that identifies each component and its quantity. Check whether local lifting equipment can handle the longest column, not just the heaviest bundle. Allow extra space for unloading and temporary storage; crowded docks make damage checks harder.
Installation needs a level floor, clear aisle plans, and enough room to maneuver long materials. Have a qualified installer verify floor conditions and anchor requirements against the rack design and site conditions. Do not assume an existing slab is suitable. That assumption can be costly. Keep the installation drawings and load information where operators can find them.
Plan maintenance around real use. Inspect arms, braces, anchors, and visible floor damage on a regular schedule, especially after impacts or layout changes. Record findings and remove damaged components from service until reviewed. Some wear is easy to miss during a busy shift. Make inspections part of the routine, not an occasional task.


